LiveLink plugin
Setting up Live Link for AR 51 in Unreal Engine.
This document provides a step-by-step guide to setting up Live Link for AR 51 in Unreal Engine.
Prerequisites
Ensure Unreal Engine is installed.
Confirm that AR 51 SDK and Live Link plugins are available and activated.
Download and Install the Plugins
Download the Plugins
-
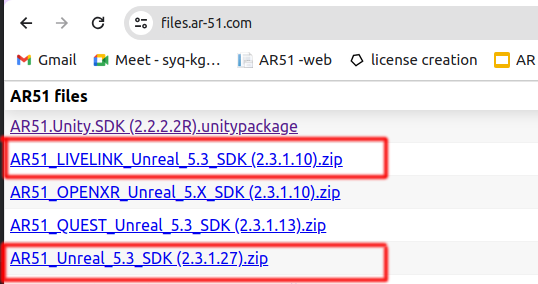
In your browser, navigate to AR Files Storage https://files.ar-51.com
-
Download the ”AR 51 Unreal SDK” plugin.
-
Download the 'AR 51 SDK_Live Link' plugin.
Install the Plugin
Project-Specific Installation:
-
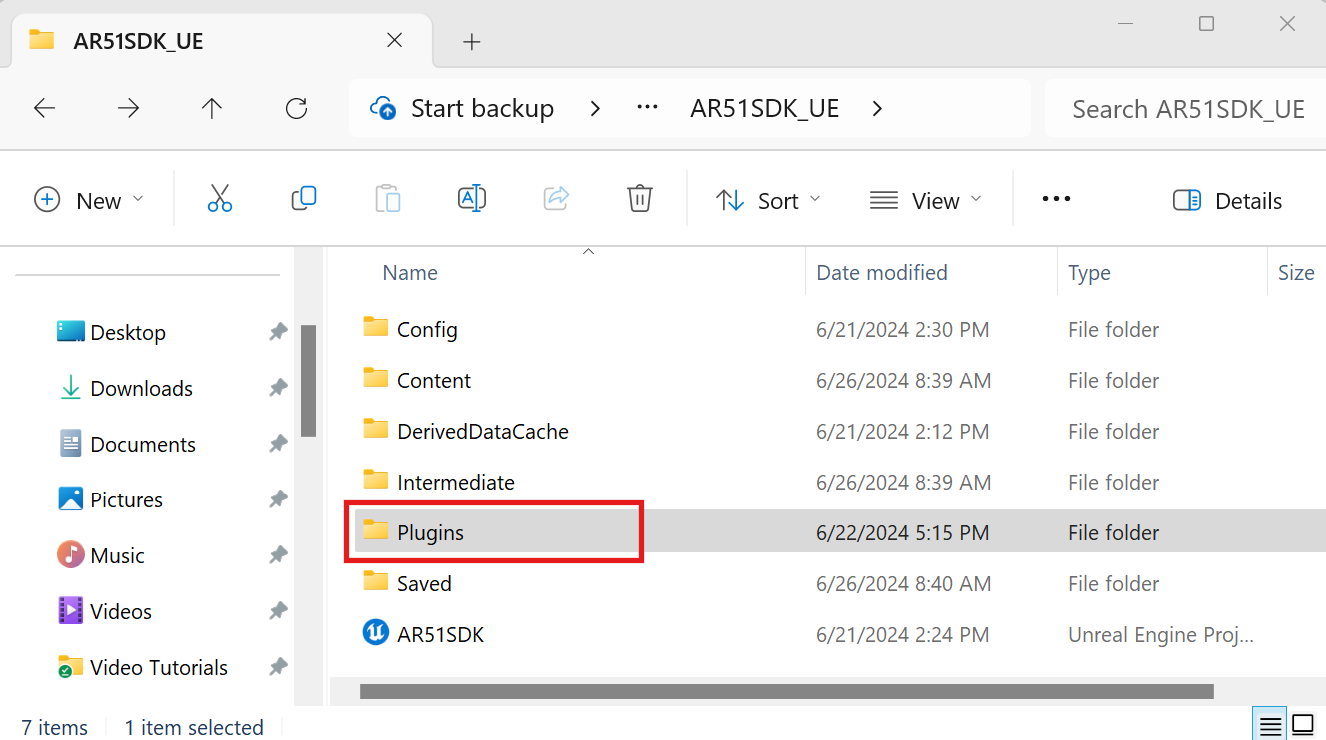
Navigate to your Unreal Engine project's root directory.
-
If a Plugins folder does not exist, create one.
-
Extract the content of the downloaded plugins into the Plugins folder.
Engine-Wide Installation:
-
Navigate to the Unreal Engine installation directory (e.g., "C:\Program Files\Epic Games\UE_X.YY\Engine\Plugins\Marketplace").
-
Extract the content of the downloaded plugins into this folder.
Note: Plugins installed here will be available for all projects using this Unreal Engine version.
Activating the Plugins
-
Open Unreal Engine and your project.
-
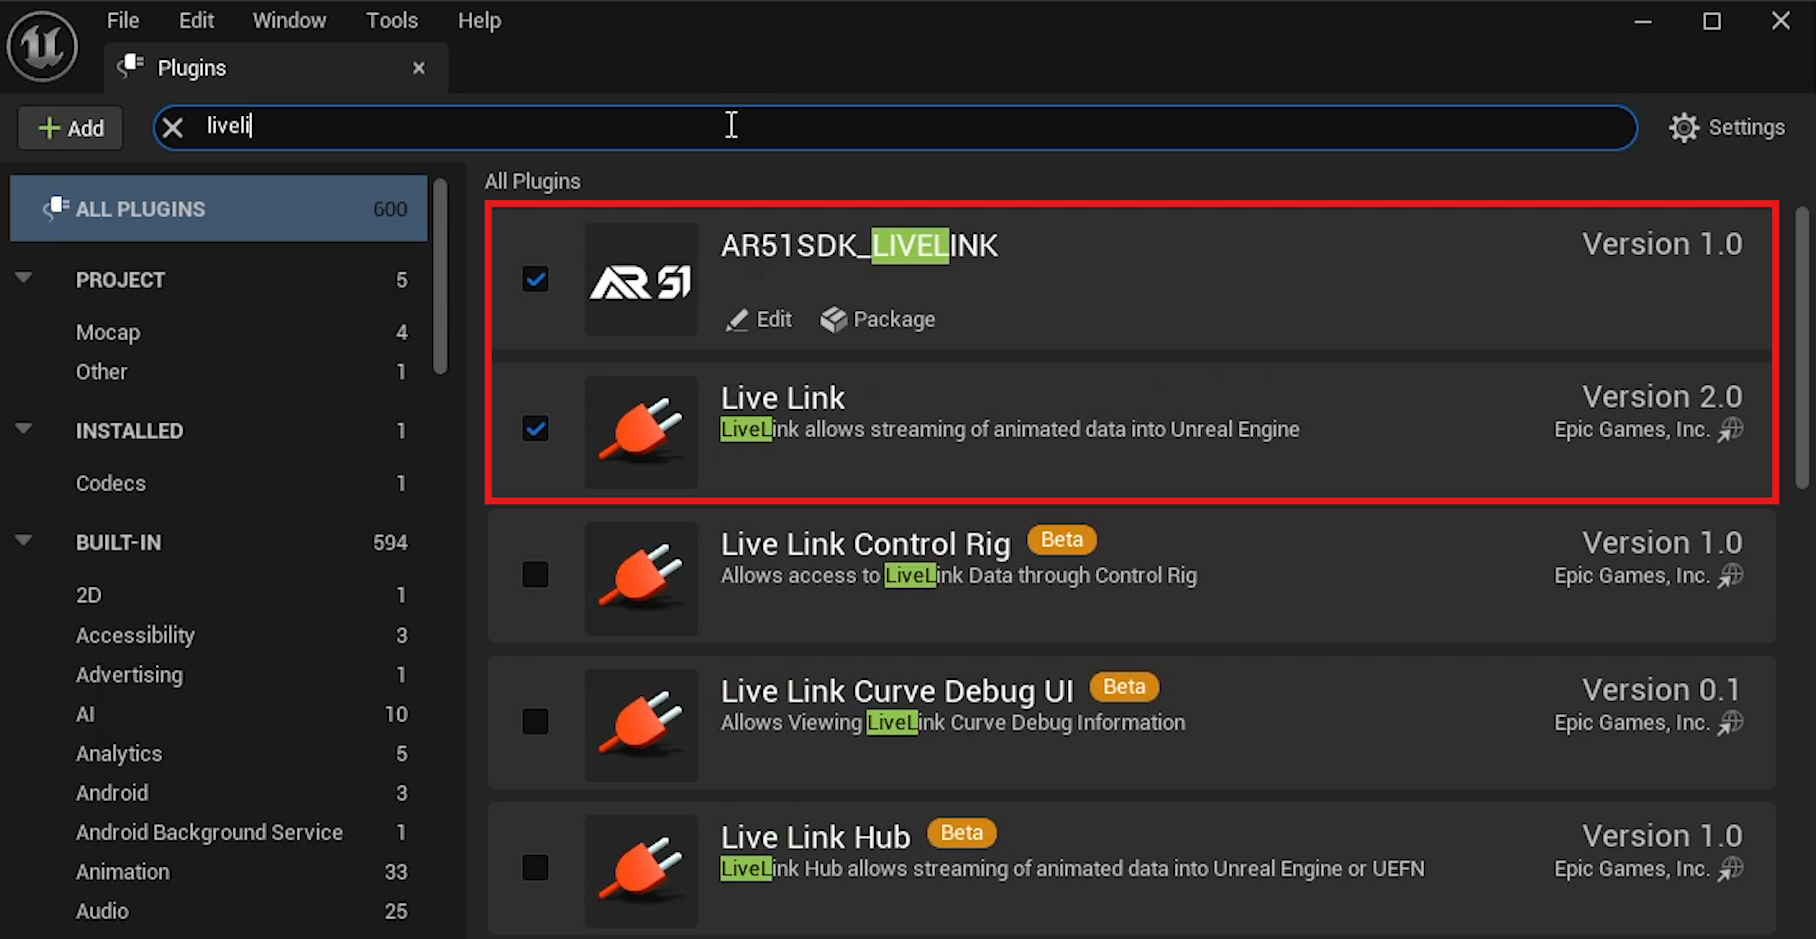
Go to Edit > Plugins.
-
In the Plugins window, use the search bar to find 'Live Link' and 'AR 51 SDK_Live Link.'
-
Ensure both AR 51 SDK_Live Link and AR 51 SDK are enabled by checking their respective boxes.
Opening Virtual Production
-
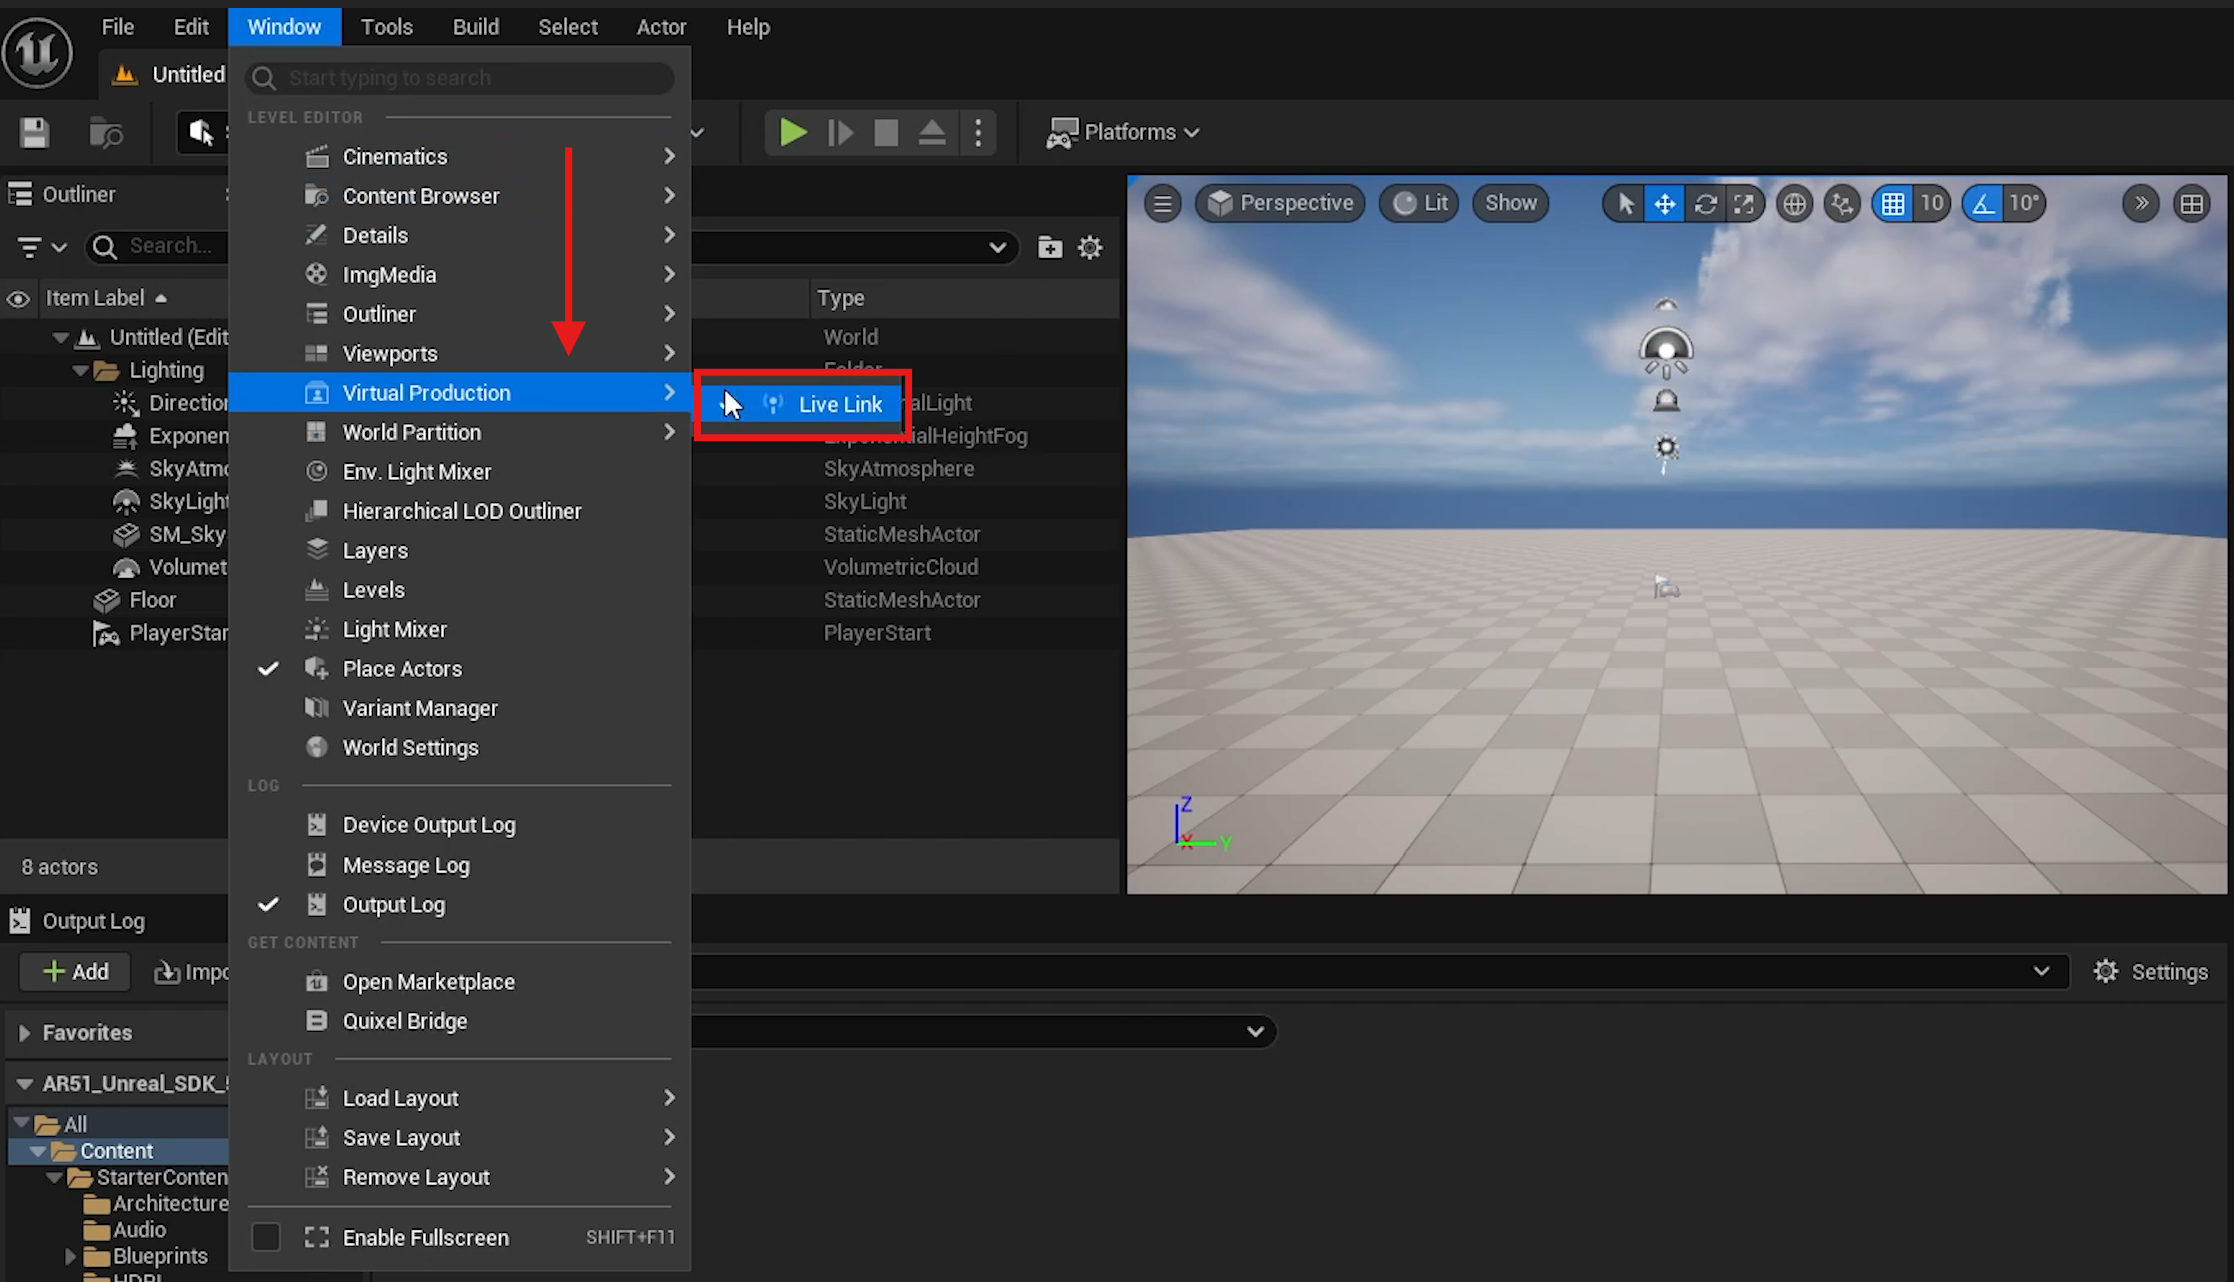
Go to the top menu and select Window.
-
Choose Virtual Production and then Live Link.
Adding AR 51 Live Link Source
-
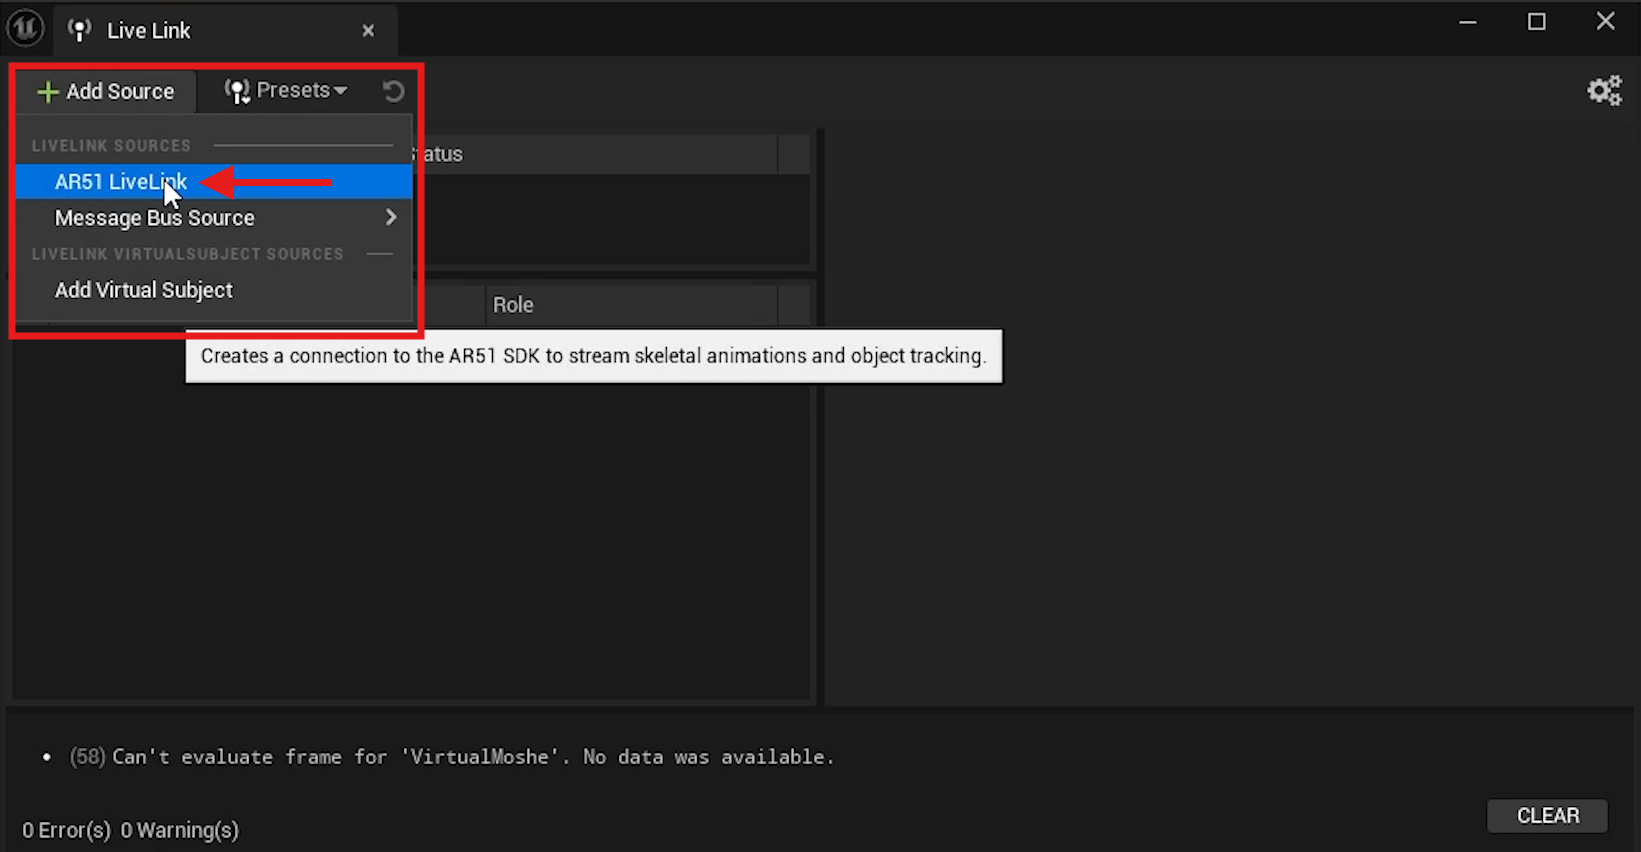
In the Live Link panel, click Add Source.
-
Select AR 51 Live Link from the list.
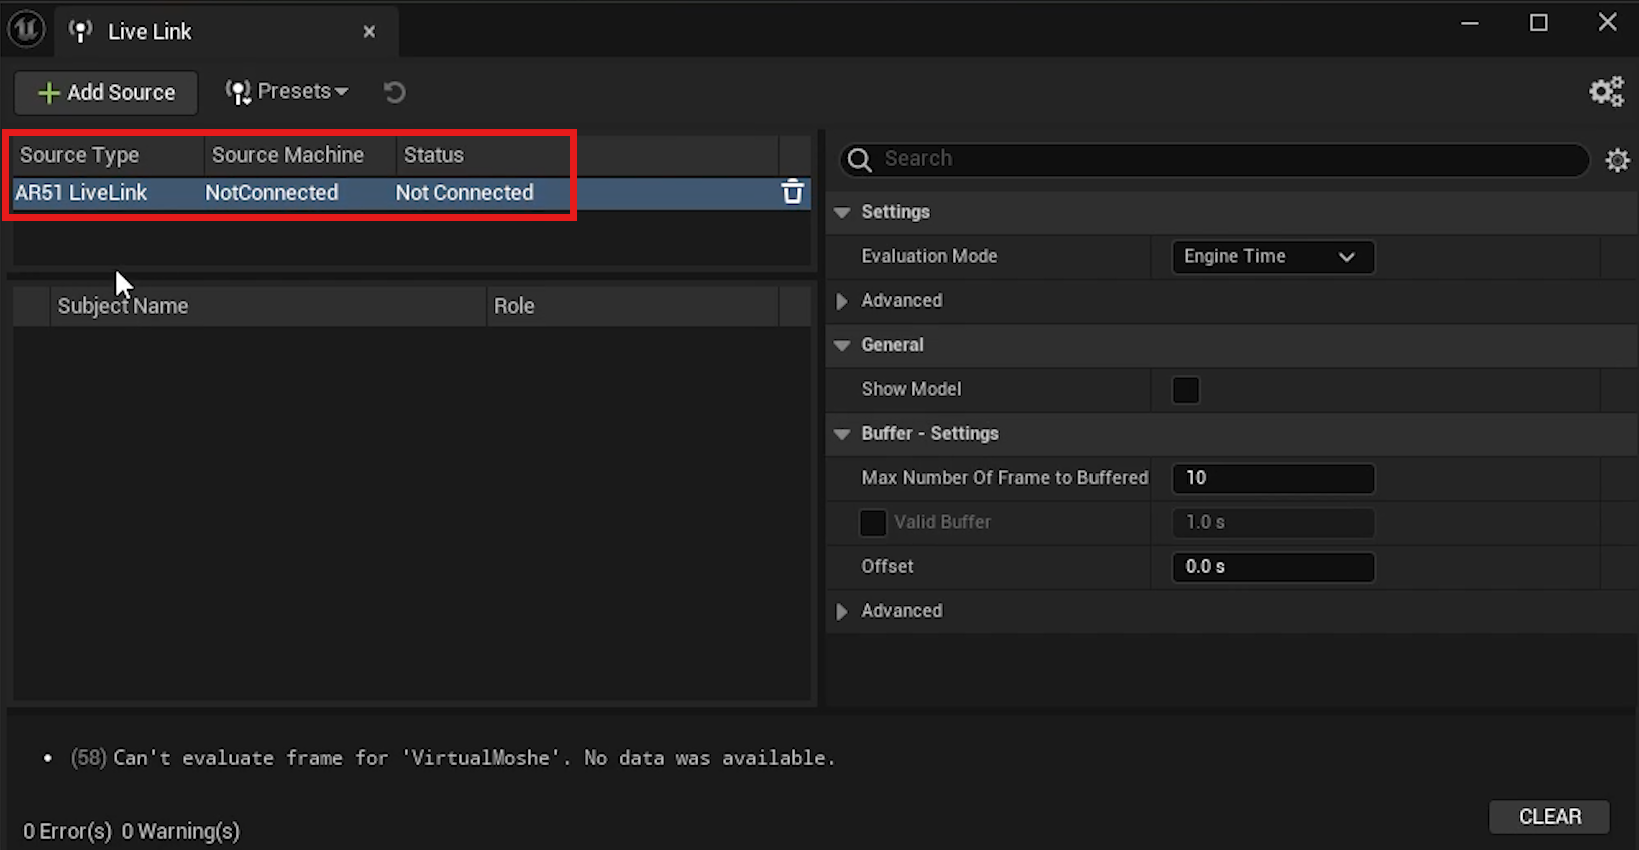
- The source type should appear as AR 51 Live Link and will appear with the status: Not Connected.
Adding Virtual Subject
-
Click Add Source again in the Live Link panel.
-
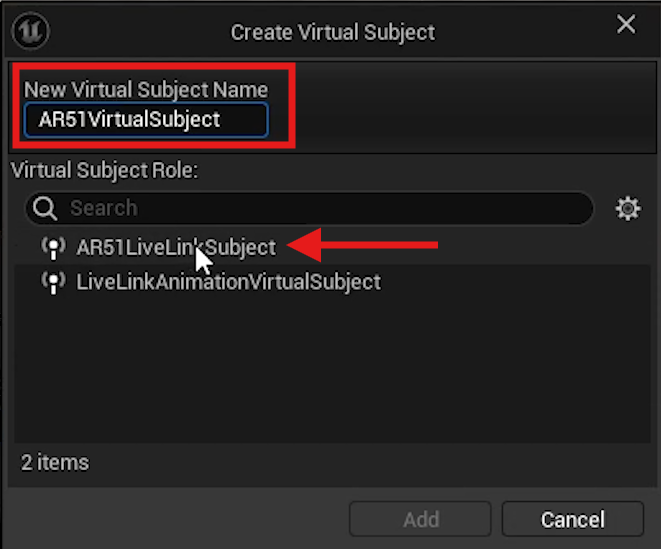
Select Add Virtual Subject.
-
Provide a name for your subject (e.g. AR51VirtualSubject).
-
Under the options, select AR51LiveLinkSubject.
-
Click Add.
Creating a Live-Link Character using the Animation Blueprint
Creating and Setting Up Blueprint
-
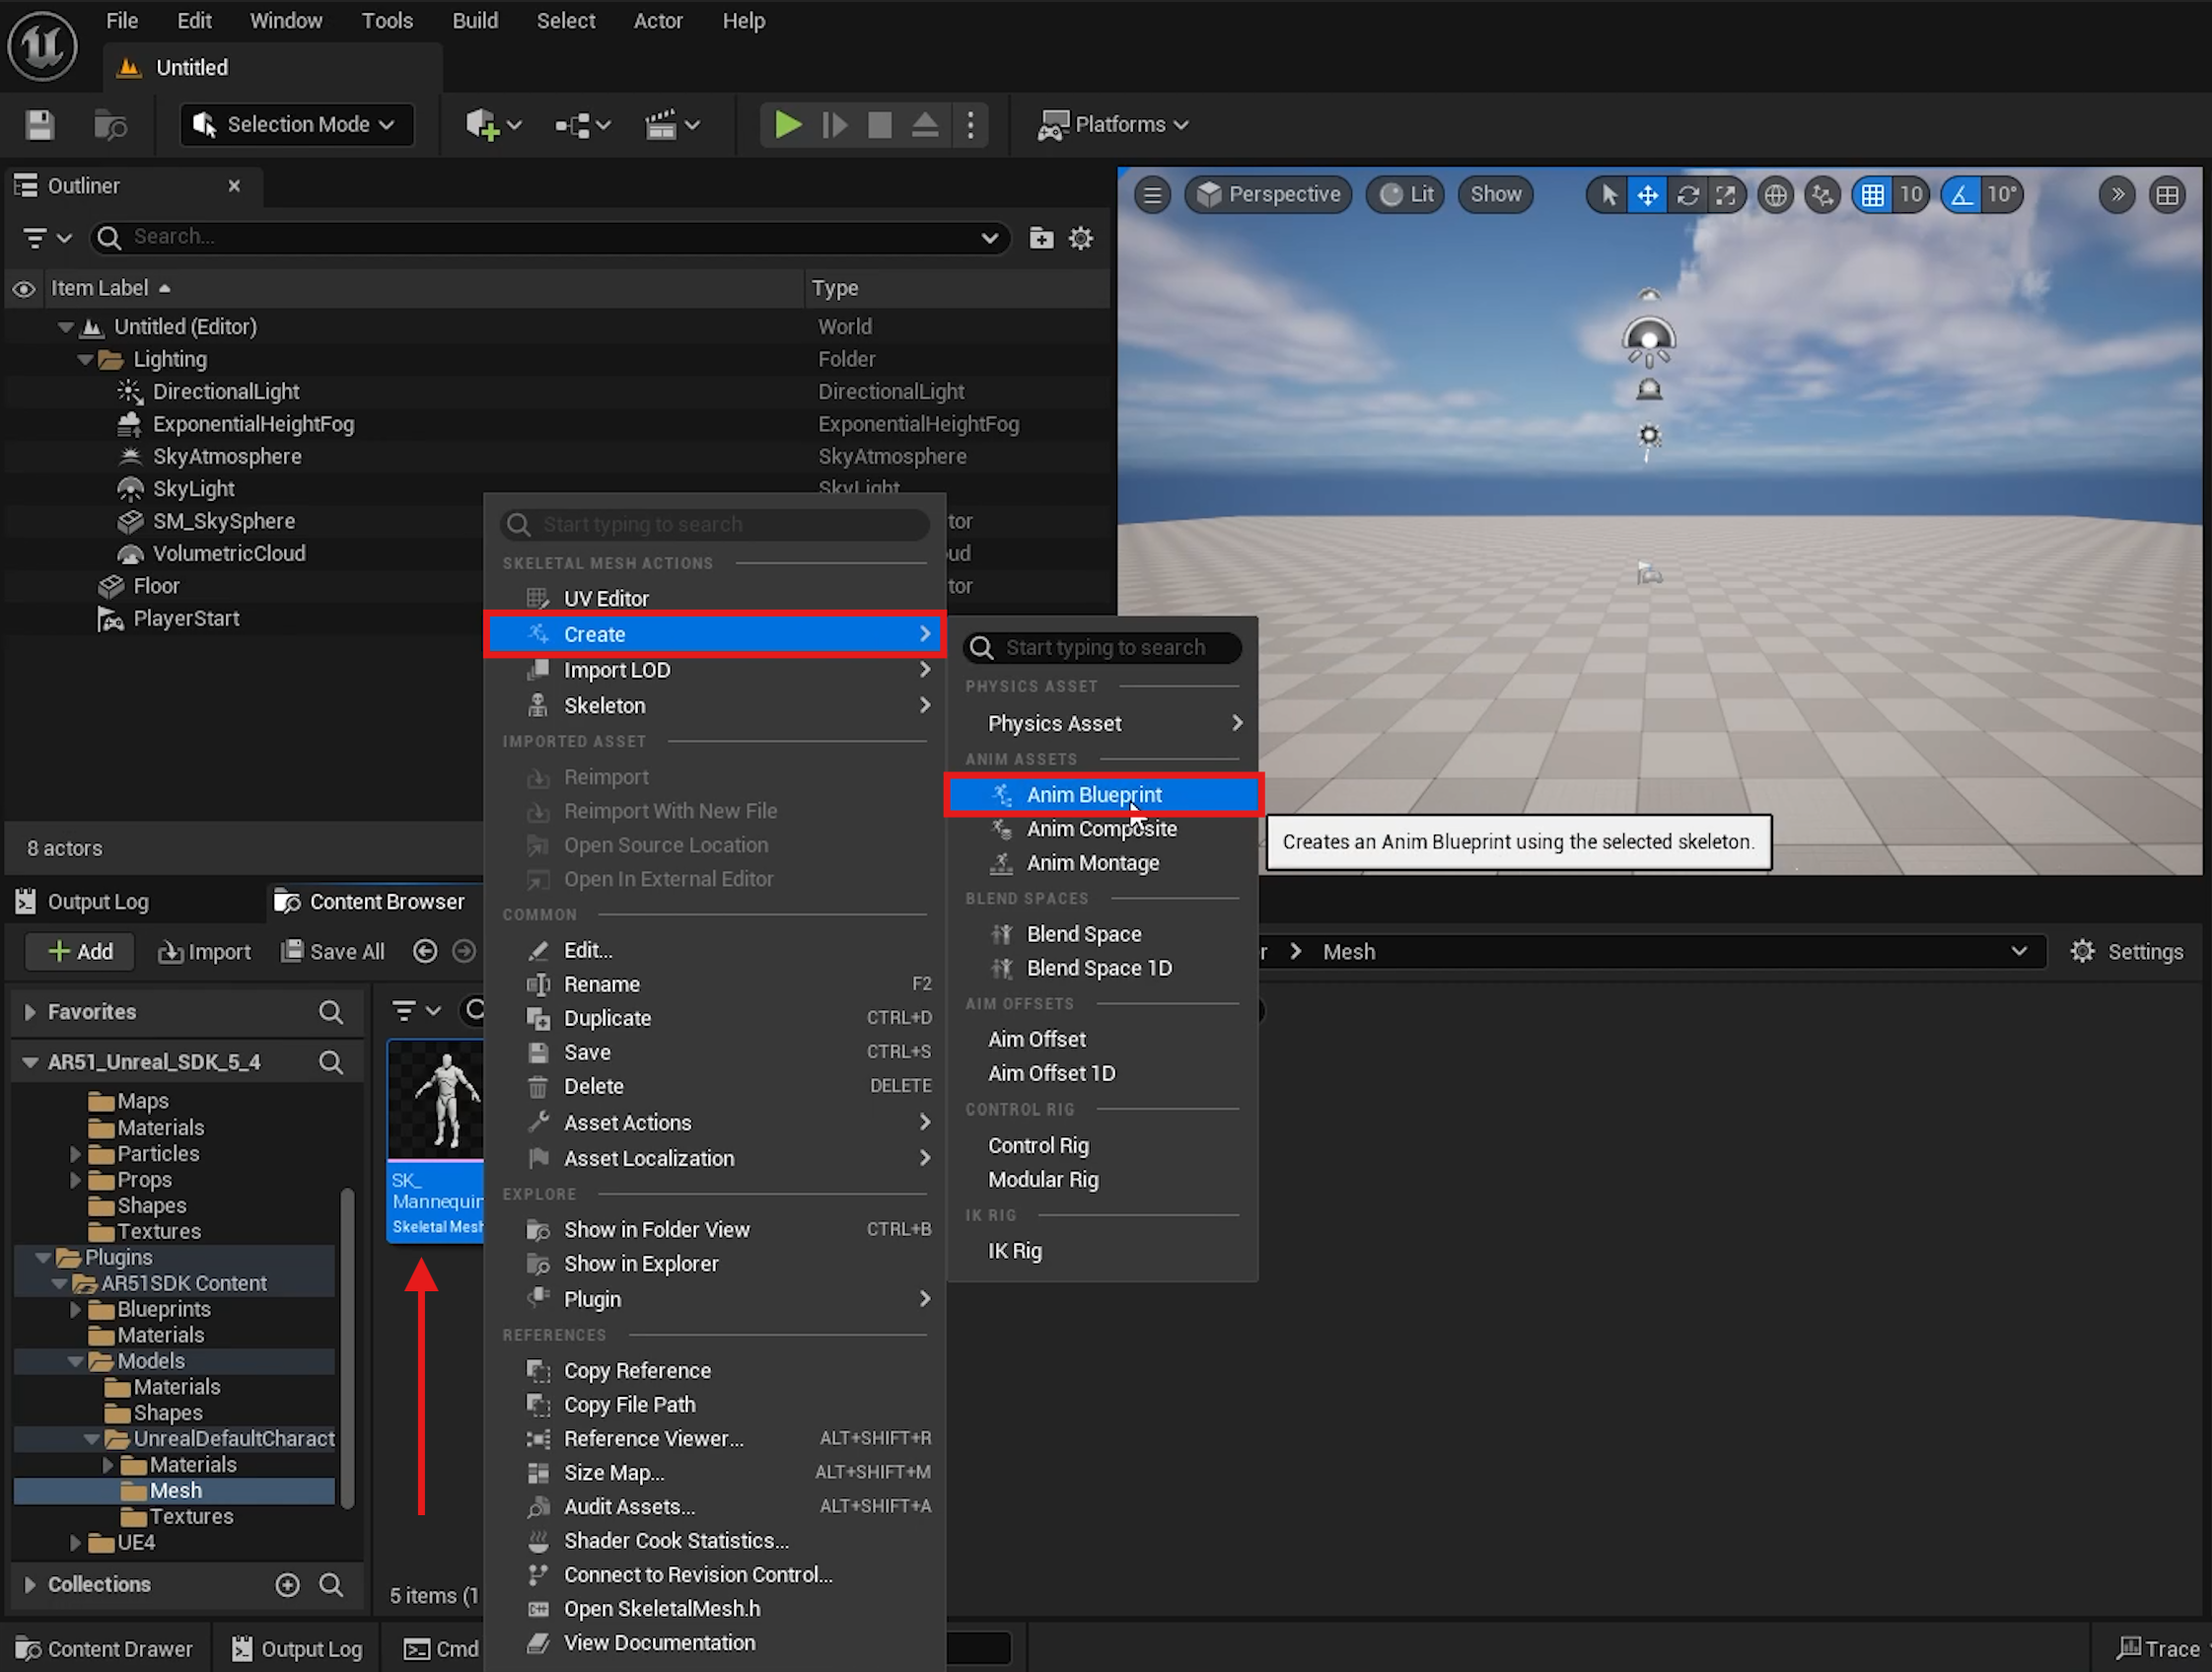
In the Content Browser, go to Plugins > AR 51 SDK Content > Models > Unreal Default Character > Mesh.
-
Locate the SK_Mannequin skeletal mesh.
-
Right-click on it, select Create, and then choose Anim Blueprint.
-
Name the new blueprint AR 51 SDK Live Link Character.
-
Move this blueprint to your project's Content folder.
Configuring the Blueprint
-
Open the newly created blueprint.
-
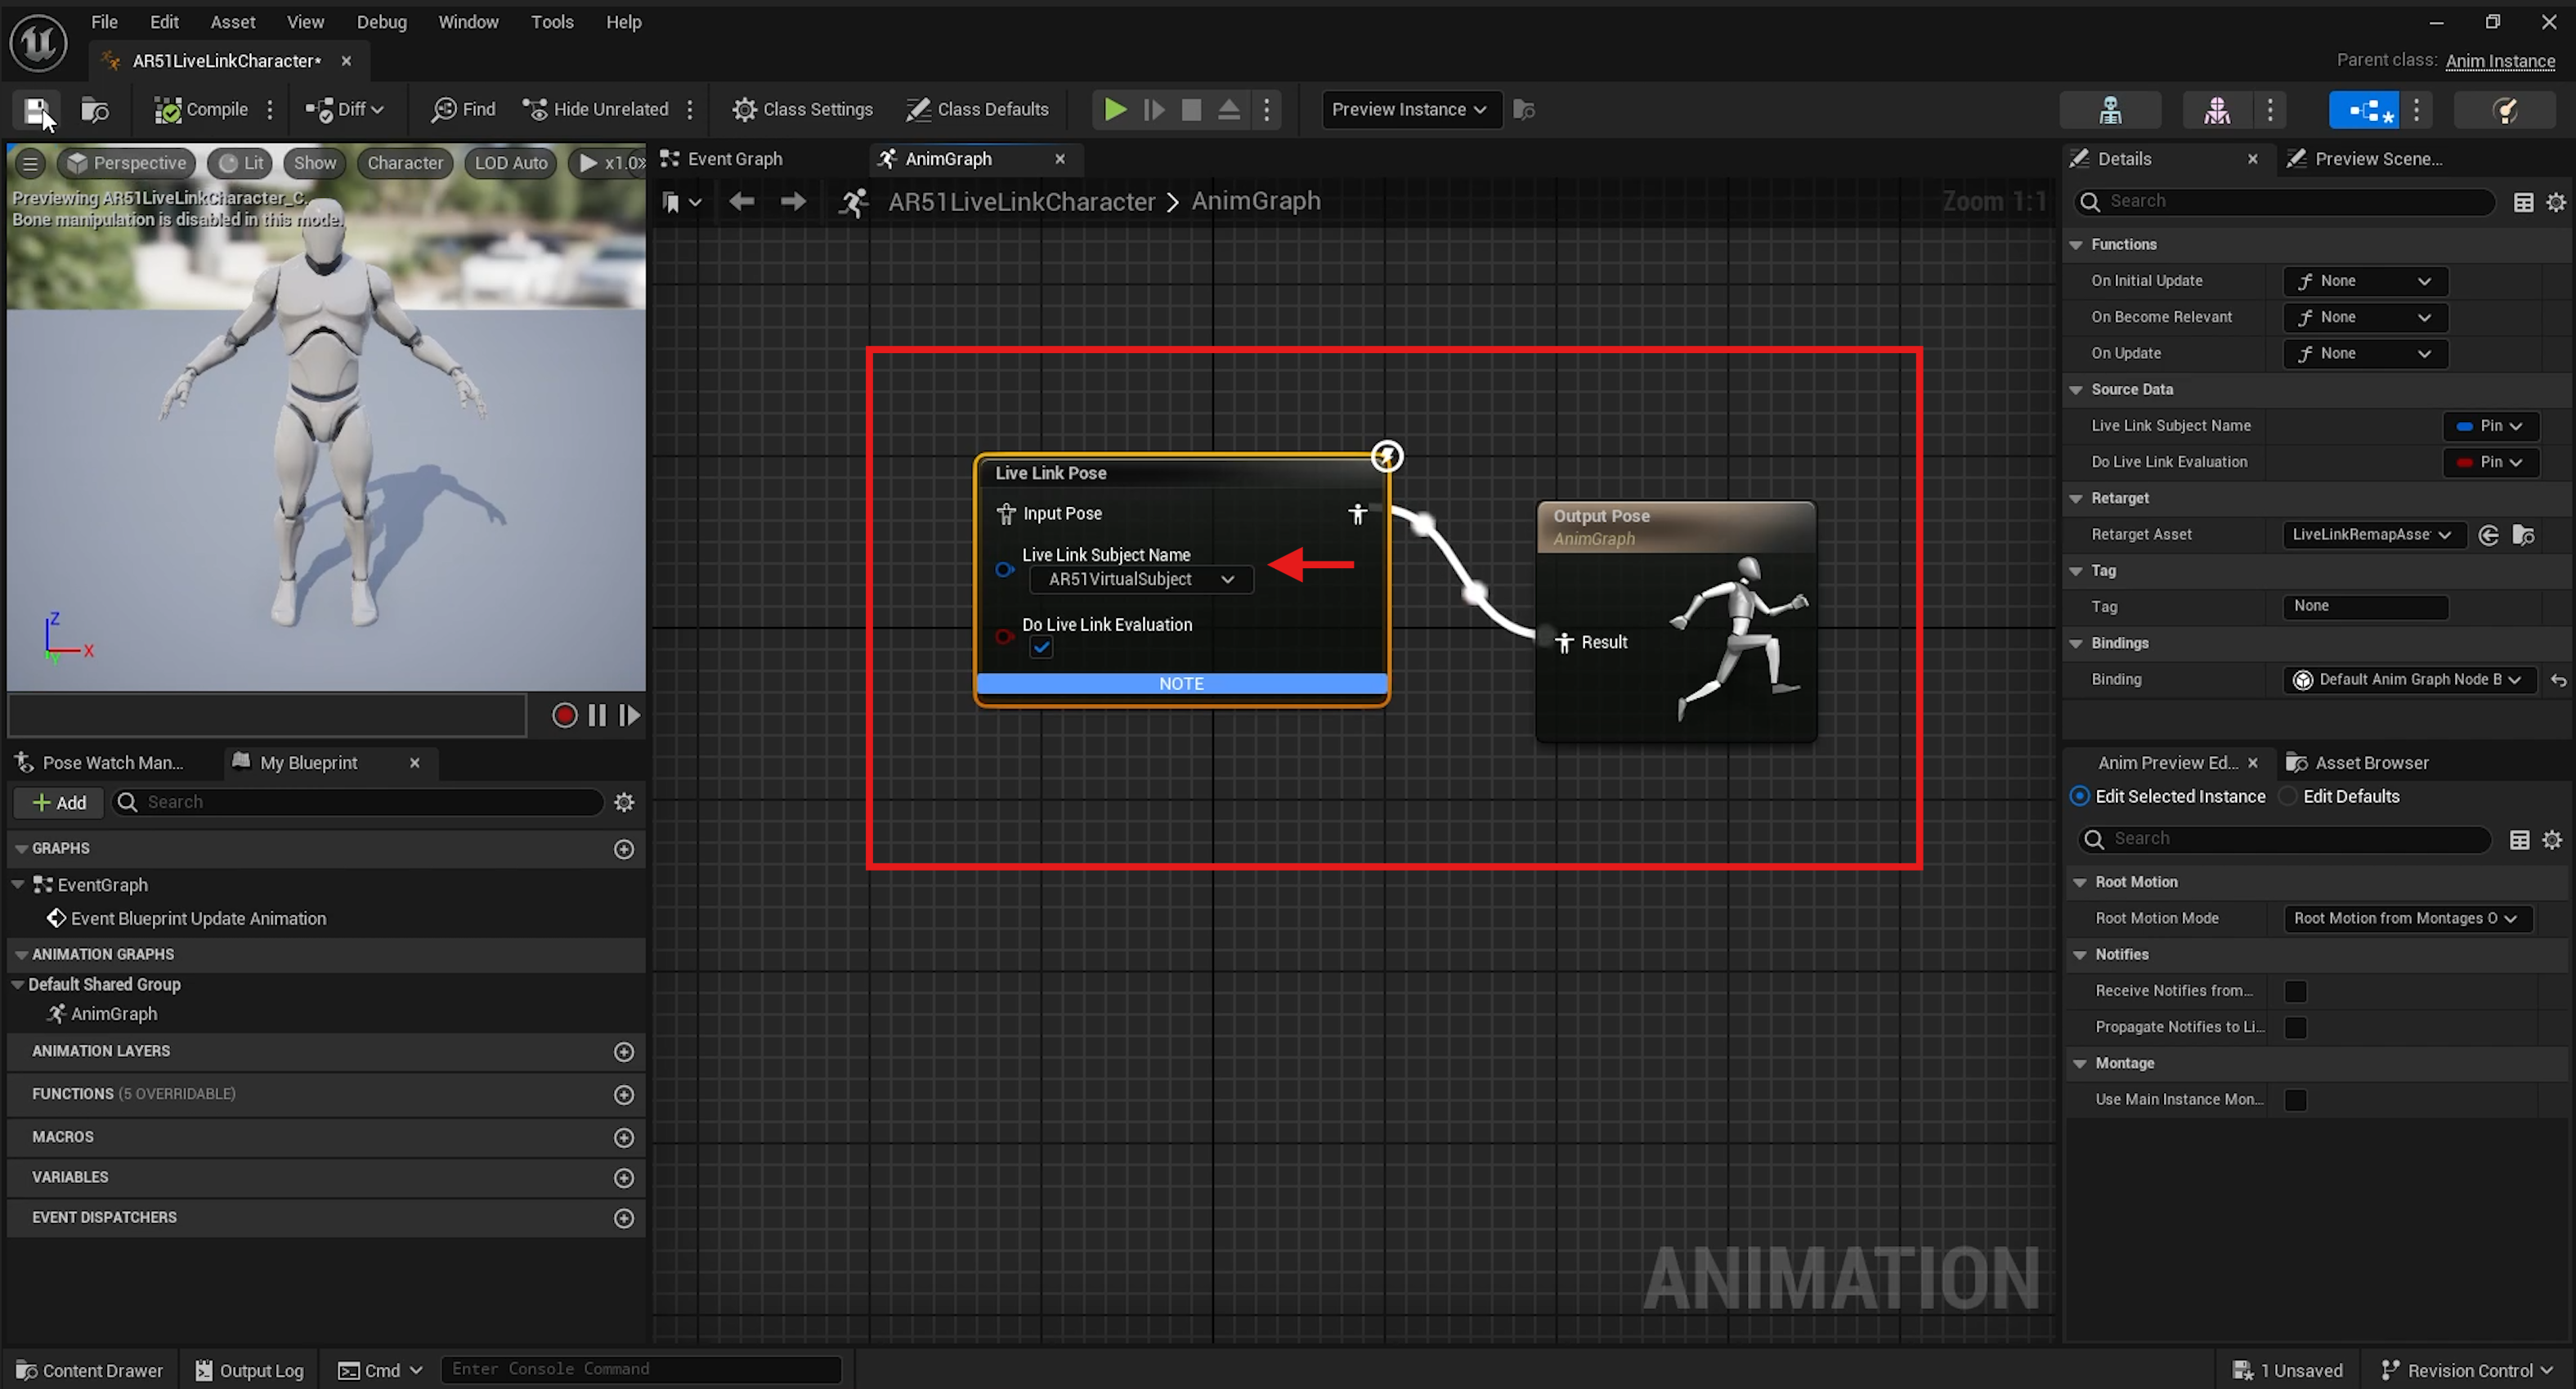
In the blueprint editor, right-click on an empty space and search for Live Link Pose.
-
Add the Live Link Pose node.
-
Connect the Input Pose to the Result Pose.
-
In the Live Link Subject Name field, select AR 51 Virtual Subject.
-
Click Compile to save the changes.
Testing the Setup
Drag AR 51 SDK Live Link Character into the level
-
Drag and drop the AR 51 SDK Live Link Character blueprint into your level.
-
Reset its location to (0,0,0) to center it.
Drag AR 51 SDK into the level
-
Drag and drop the AR 51 SDK blueprint into your level.
-
Reset its location to (0,0,0) to center it.
Play and Examine the Live-Link connection.
-
Press Play to start the scene.
-
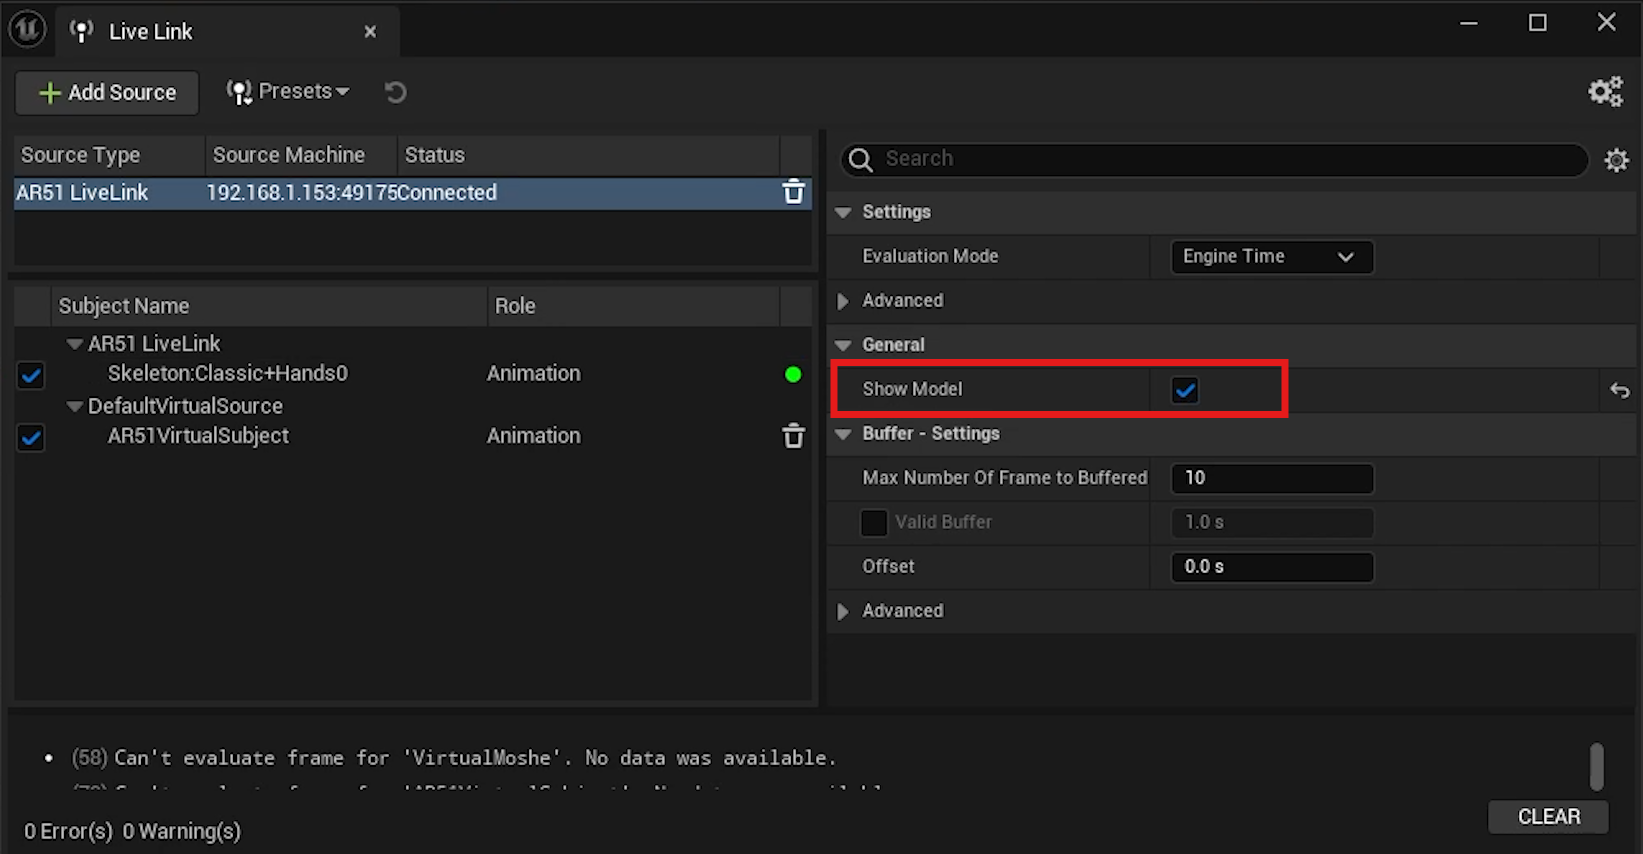
Open the Live Link panel from Window > Virtual Production > Live Link if it's minimized.
-
Ensure that AR 51 Live Link in the subject name list shows as connected.
-
In the right-side attributes panel, ensure Show Model is enabled under General.
Conclusion
You've successfully set up Live Link for AR 51 in Unreal Engine. For any issues, revisit the steps and ensure all settings are correct. Thank you for following this guide.